ADOBE TUTORIAL
By Nur Izyan Nadhirah Zaidi
Hi guys, so today I will guide you step-by-step on how to use Adobe Photoshop Pixel Stretching Effect (Circular)
Step 1
-
Open Adobe Photoshop and click Ctrl + O or File > Open to open the image you want to use
Step 2
-
Remove your background image by using Magic Brush Tool. Add 2 new layer below your image layer. (Image 1)

(Image 1)
Step 3
-
For the background layer, you can use whatever color you want (I will use white color first). For the second layer, convert the layer to Smart Object. (Image 2)

(Image 2)
Step 4
-
On the Smart Object layer, use Singel Row Marquee Tool to create a line (The line will get you the area you want to stretch)(Image 3).On the image layer, click Ctrl + C and double click on the Smart Object layer to open(you will see a new blank canvas) and click Ctrl + V. (Image 4)

(Image 3)

(Image 4)

(Image 5)
Step 5
-
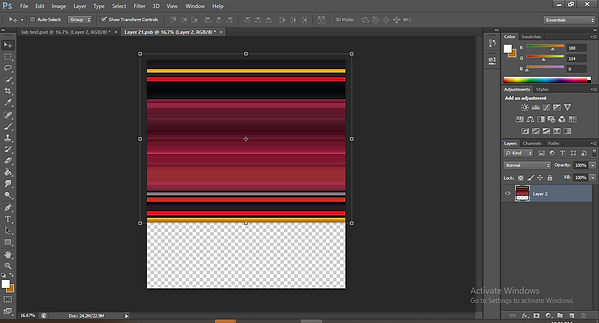
To adjust the line, press Ctrl + T and click on the box Show Transform Control (so you can see the object ). Rotate 90' and press Shift + Alt while dragging the line. Your line will become rectangular. Move the rectangular to the top. (Image 5). Save the file by pressing Ctrl + S.
Step 6
-
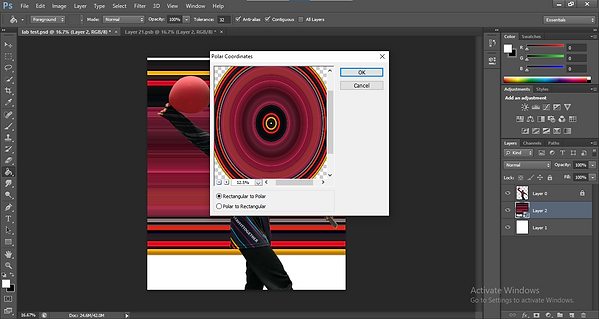
After you see the object behind the image, go to Filter > Distort>Polar Coordinate to create a circular effect on the object. You can choose the size of polar that you want. (Image 6)(Image 7)

(Image 6)

(Image 7)

(Image 8)
Step 8
-
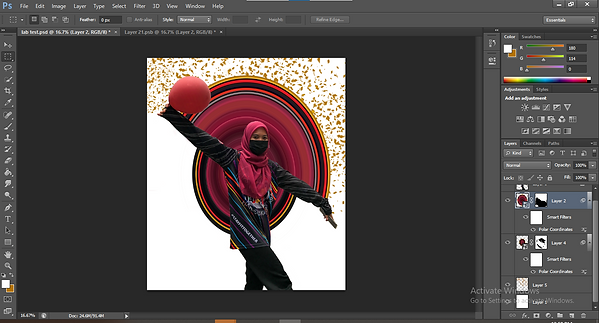
If you want to delete some of the polar effects, On the Smart object layer, add a vector mask. On the vector mask, choose a soft brush to delete the area you want. (Image 8).(In this tutorial I repeat step 7 and 8 to create the image I want).(Image 9)

(Image 9)
Step 9
-
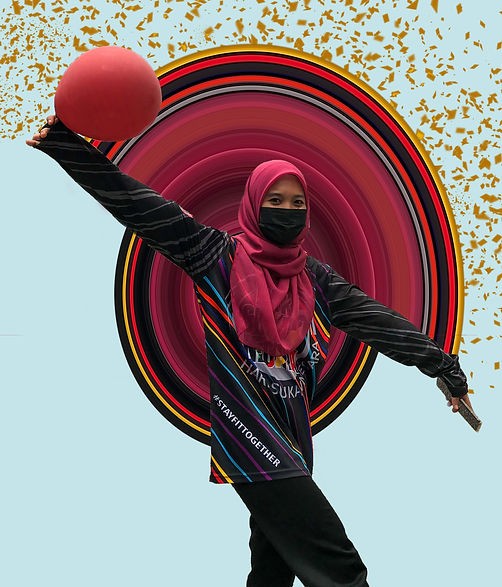
Next step, I use a Dispersion effect brush on the image. You can download the brush at this link https://www.brusheezy.com/brushes/61374-20-dispersion-ps-brushes-abr-vol-5

(Image 10)
Step 10
-
To apply the brush, you can choose any of the brushes from the packages and use the eyedropper tool if you want any of the colors from your image. Click on the area you want.(Image 10) Save your file as a .jpeg if you want it in image or .psd if you want to edit later.
